Introduction
In this guide, we’ll go through the steps required to send a document from Power Automate to your Cradl AI agent for extraction.Before you begin
- Verify the Cradl AI for Power Automate connector is available in your tenant (through a premium license or custom connector deployment).
- Prepare a test document to upload when you run the flow.
Setting up your Power Automate flow
In the following steps we’ll configure the flow in Power Automate by adding the Cradl AI action and specifying the document content to process.Add a Power Automate trigger
In Cradl AI, open your agent and add a new trigger. Choose Power Automate from the list of integrations. Click the Import from Power Automate trigger and copy the Client Credentials value from the configuration panel.

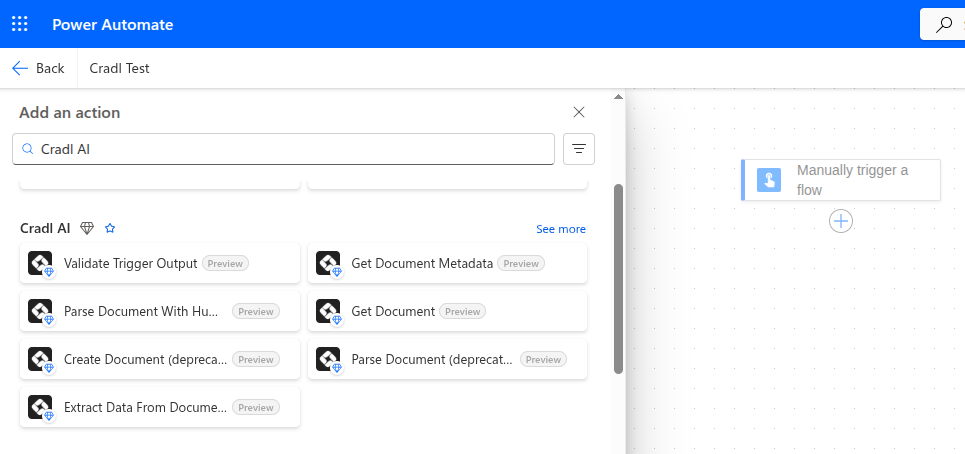
Add the Extract Data From Document action
In your Power Automate flow, add the Extract Data From Document action.

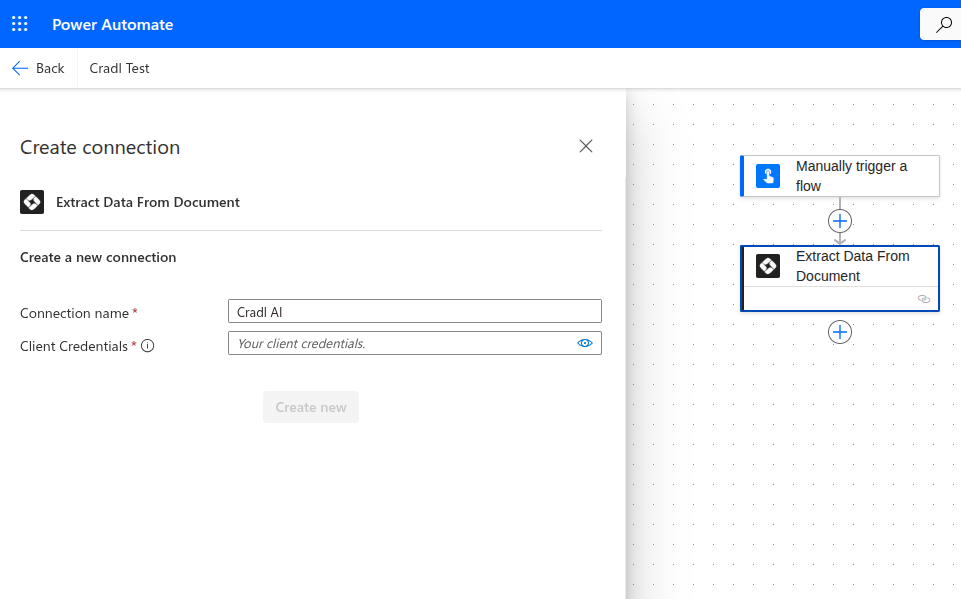
Create a connection to Cradl AI
In the Client Credentials field, paste the value you copied in Step 1.

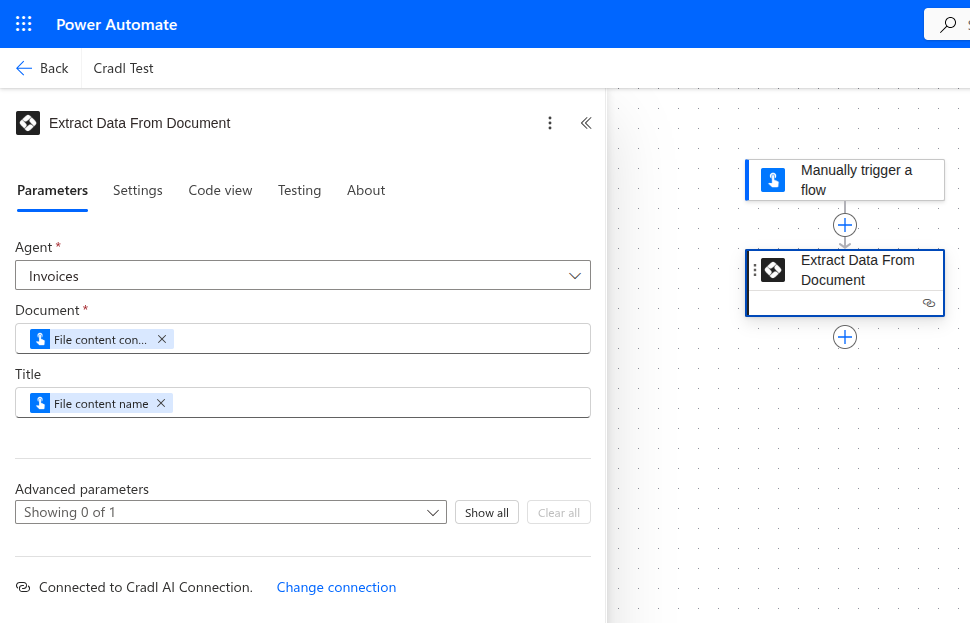
Configure the action
Click the Extract Data From Document action to open its settings. Choose the Cradl AI Agent that should process the file. For Document, select the binary file content from an earlier step—for example, the 
File Content output from Get file content (OneDrive) or the file supplied by a manual trigger. Optionally set Filename so the agent receives the original name and extension.
Troubleshooting
- Run the flow manually with your sample document and review the Run history entry. Expand the Extract Data From Document action and confirm its status code is
200. - If Power Automate reports
401 Unauthorizedor404 Forbidden, reopen the Cradl AI integration, copy fresh client credentials, and update the connection. - For other errors, make sure the file format is supported, the document is not encrypted, and your Cradl AI usage limits have not been exceeded. The message under Outputs → Body provides details when validation fails.